

Summary: This article explains how to format a MacBook Pro without losing your data in the internal hard drive and guide you how to recover data after wrong formatting with Bitwar Data Recovery Software.
People reformat their MacBook Pro, iMac for many different reasons. If you’re going to sell your MacBook Pro or iMac and would like to restore it to factory settings, then you’re doing the right thing by formatting it. Or if you’re just sick of it being so slow and you want to run fast and good as new again, formatting is also a good way to make that happen.
Just please always remember that formatting your computer will erase Mac hard drive to wipe out ALL of the data stored in it. Make sure to back up your files before getting started. Save everything in an external hard drive or in the cloud if you have an online drive.
Now let’s make your computer good as new with below 6 steps.
Table of Contents
How to Format a MacBook Pro?
Step 1: Startup Your MacBook Pro
It’s important that you go to the startup for this step, as the next step would need to be done IMMEDIATELY as the gray startup screen appears. If your computer is turned off at the moment, just boot it as usual and proceed. If it’s turned on, however, you need to restart it before you can proceed.
Step 2: Hold Command + R during startup
Holding the command and R keys during startup would launch the macOS Utilities window. When you see the Apple Logo and the loading bar, you can release the command and R keys.
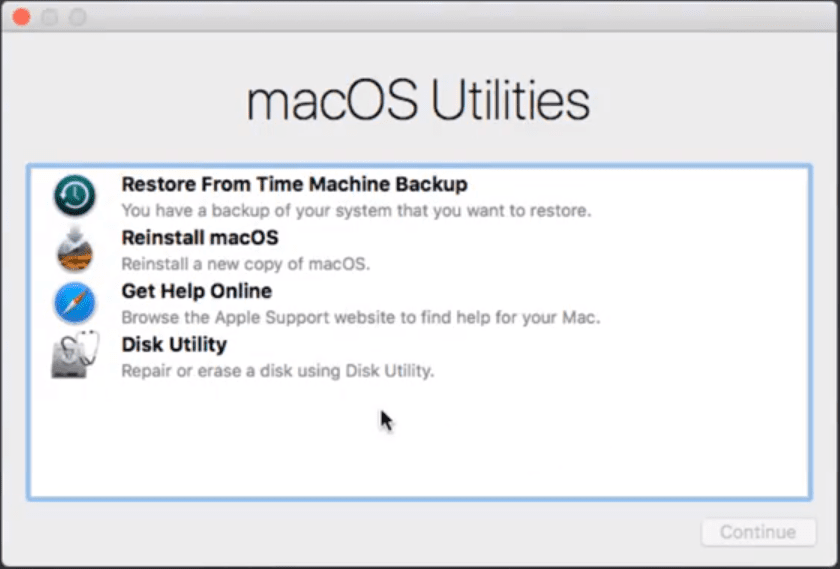
Step 3: Select Disk Utility
When you see the utility window, click on the Disk Utility found at the bottom of the list and then click Continue. This will lead you to another window for the next steps.
Step 4: Select your Main Drive and Click Erase
To the left of the new window, you will see the drives present on your computer. Select your startup drive (usually it’s “Main”) and click the Erase button on the top part of the window.
This will show you a popup window that allows you to customize the name and format of your drive. In the Format menu, make sure that you select Mac OS Extended. Then click the Erase button.
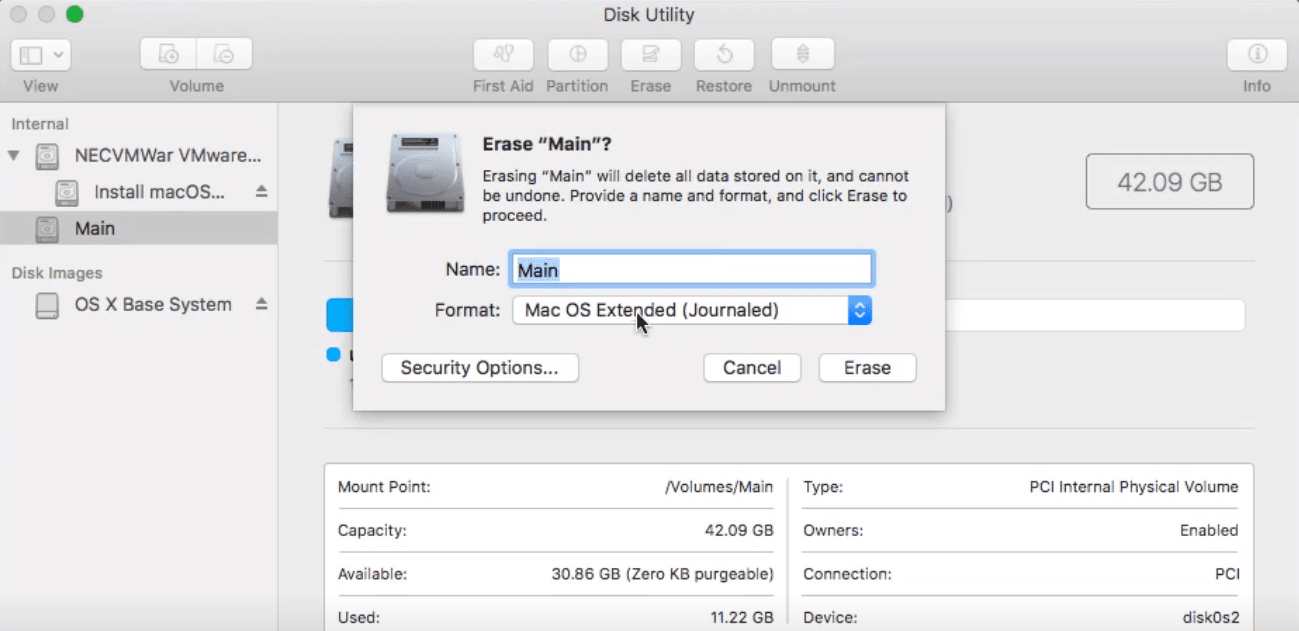
NOTE: From this point on, the macOS will erase all of the data saved in your internal hard drive.
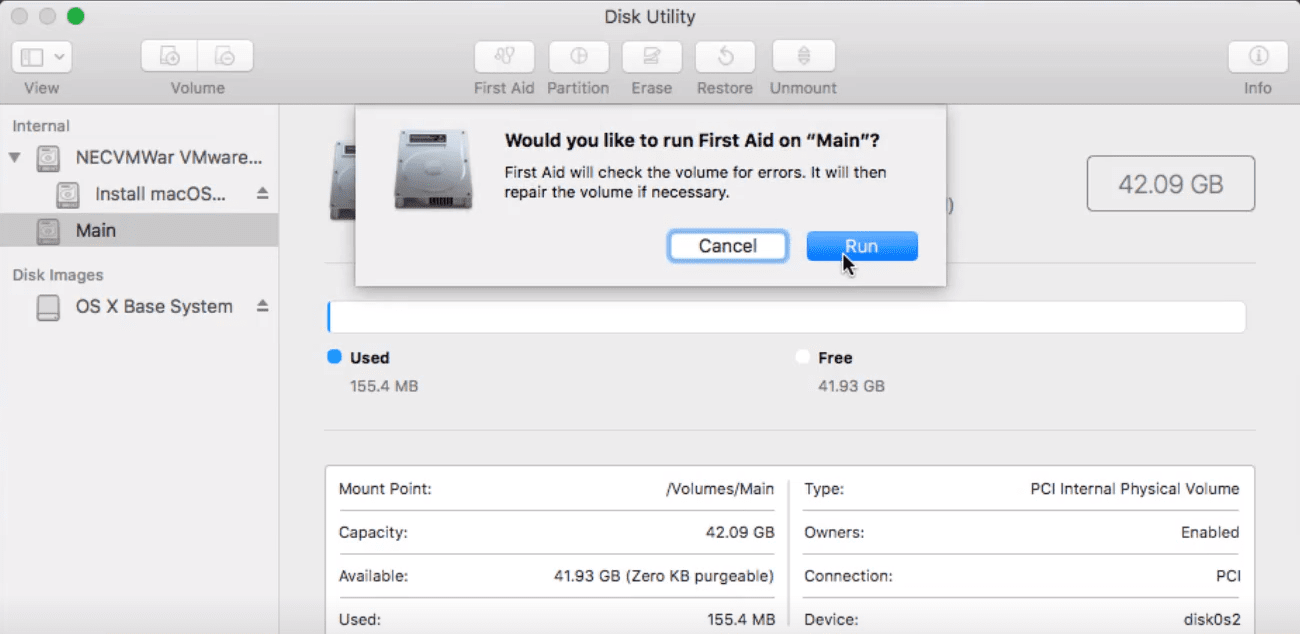
Step 5: Run First Aid
You can choose to run First Aid on your drive. This checks your drive for errors and will repair any issues if necessary. You can find the First Aid button on the top part of the window. Once done, click the Done button and close the Disk Utility window.
Step 6: Reinstall macOS
When you close the Disk Utility window, you will be back to macOS Utilities. What you need to do next is to click “Reinstall macOS” and then the Continue button. From this point on, the on-screen instruction should seamlessly guide you through the rest of the process.
Recover Data (If necessary)
You may know better how to format a MacBook Pro and formatting any storage drive will erase the data in that drive. If you backed up your files, that’s good! But, if for any reason (corrupted backups, edits not backed up, etc.), you need to recover files from your computer, it is still very much possible.
To do this, the first thing you should do is to install Bitwar Data Recovery for Mac. This is a top-notch data recovery software that you can use to recover deleted files. Yes, even files deleted through formatting!
NOTE: Just make sure that you don’t create any new files on your computer. Doing so will overwrite the “dormant” files in your disk and they will be gone for good.
Once you have it installed and have created an account in the software, you can recover your files using simple steps:
Steps to Recover Data after Wrong Formatting
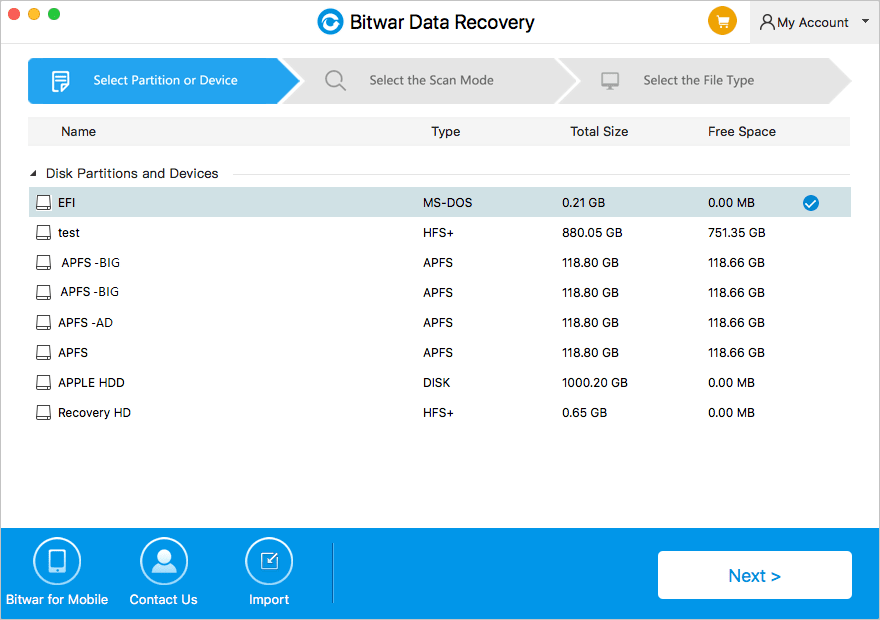
Step 1. Select Partition Or Drive
Bitwar Data Recovery will display a list of all internal drives and all external drives connected to your computer. Select your MacBook Pro’s hard drive. You should know which one it is since you just formatted it. Click Next to proceed.
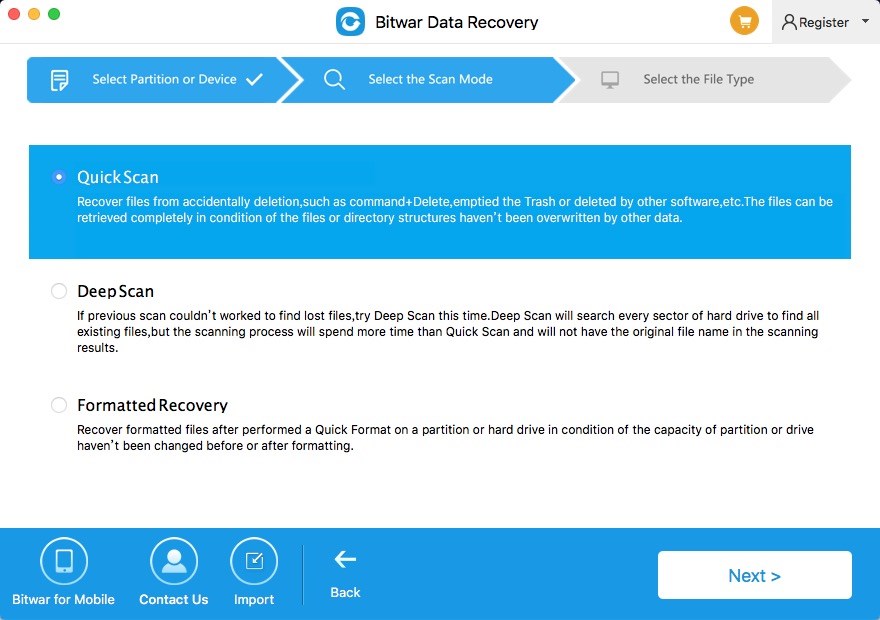
Step 2. Select the Scan Mode
There are three scan modes that Bitwar Data Recovery offers, all with different levels and different functions. Quick Scan is the quickest way to get back the deleted files. This scan mode recovers files in their assigned filenames and other original details.
If Quick Scan fails, though, the Deep Scan might do the trick. This scan mode searches the inner sectors of the drive. It produces more results, but the files recovered through this scan mode will have generic file names such as File000001, File000002, and so on.
For your situation, it’s better to select Formatted Recovery. This scan mode is specially designed to deal with freshly formatted drives. Tick this option and click Next to proceed.
If you are having interests in reading How to Recover Data from Formatted Hard Drive for Windows, you can check this tutorial to learn more.
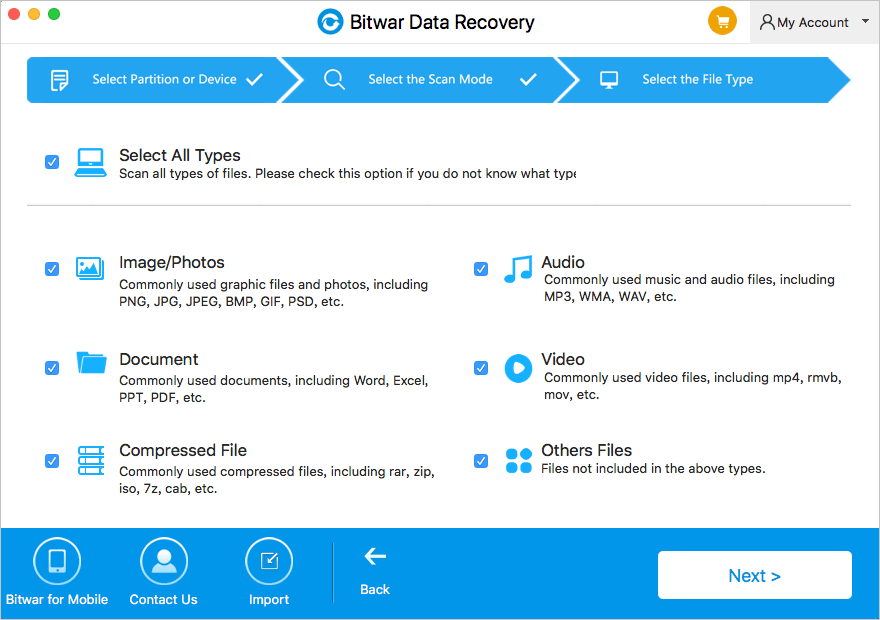
Step 3. Select The File Type
If you’re going after specific file types (i.e. audio, video, photos, etc.), this is a good way to narrow your results and make the scan faster. If you’re doing a general scan, however, you can just tick the Select All Types box. Click Scan to proceed.
Step 4. Preview Your Recovered Files and Save
To make sure that the files appearing in the scan result are still in good condition, you can preview the files. Files that were already partially overwritten will show as corrupted or damaged in the preview window.
But if the files are still working as seen through your preview, go ahead and recover them. This will allow you to choose the save path for your recovered files.
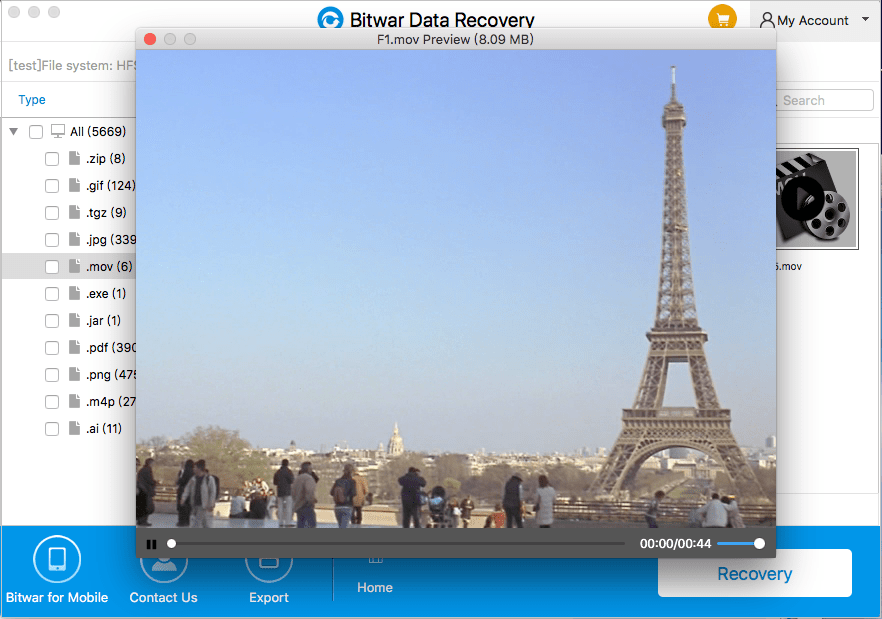
NOTE: Make sure that you don’t save the files on the disk that you are scanning.
Learn to Format!
Make sure that formatting your MacBook Pro is exactly what you are going to do because the formatting is such operation will erase all of the data you have saved on the hard drive. However, formatting isn’t meant you will lose the data permanently, with certain data recovery software that will help get back formatted data.
Thus, to make your Mac works as new, follow the above 6 steps of how to format a MacBook Pro or recover data after wrong formatting with Bitwar Data Recovery for Mac.


